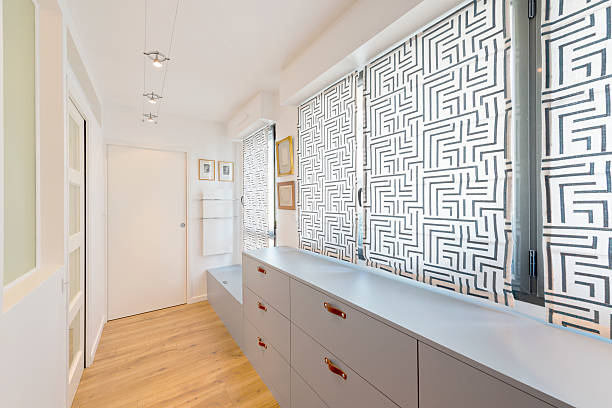
If you are looking for some elegant window covering ideas, then go for Roman shades. Not only do they look good but they are also the best window treatment option when you are low on budget.
Roman blinds give you extra privacy and block unnecessary light from entering the room when needed. You can either buy ready-to-hang shades or make your own from scratch using wooden dowel rods. There are two methods to design your own Roman shades at home. Given below are the detailed instructions for each method:
How to DIY Perfect Roman Shades for Your Home
Decide the Length of Your Roman Shades
The blind should be laid out on your work table with the front down. Measure the window to find out how long your Roman blinds should be. Your blinds should have the same length as the window.
Remove Extra Blind Slats
Only the thicker strings connecting the slats on the front and back should be cut. Divide the length in inches by seven to get the distance the shade will span across the window. You must leave this number of slats on the blind strings.
Arrange Slats on Fabric
Under the blind, place the fabric face down. Leave about 2 inches of fabric on all sides, and mark the cloth where it folds at the sides, top, and bottom of the slats. Trim any extra fabric. To make neat hems, use an iron to press the cloth folds.
Attach Fabric Around Bracket
Remove the stopper from each end of the top bracket before covering the blind with fabric. To make the fabric wrap around the end beautifully, make a tiny notch in it. Apply decoupage medium with a foam brush to the fabric and bracket, press to adhere, and hold in place with clothespins while drying.
Secure Fabric and Attach Bottom of Roman Shades
In the areas where you marked the placement of the slats, brush decoupage medium onto the front side of the slats and the edges of the cloth. Put in place, tucking the slat ends under the folded edges, at the indicated 7-inch intervals.
Slightly fold the fabric’s bottom edge for neatness and wrap the cloth around the blind’s bottom bar. As it dries, use clothespins to clamp. Like a conventional small blind, install your DIY Roman shade.

How to Sew a DIY Roman Shade with a Lining?
Fabric and wooden dowel rods can be used to create a Roman shade as well. Double-layered fabric is used in this do-it-yourself window treatment to block more light and increase privacy.
Things You Will Need
- 10 cabone rings
- Shade-and-blind cord
- Cleat
- Size 8 wood screws
- Measuring tape
- Fabric
- Lining fabric
- Pine board
- Two screw eyes
- Quilter’s ruler
- Fabric marking pen
- 5 Wooden dowels
Determine Measurements for Roman Blinds
Inside the window frame or recess, measure the window’s height and width. The cut length for the fabric’s width should be the window’s width plus two inches.
Precisely Cut Lining Fabric
The lining fabric should be cut to match the length of the fabric of your Roman blinds. The breadth of the lining should match the width of the window inside the window frame or recess. One panel of lining fabric in this size is required.
Cut and Prepare Mounting Board
To fit the window’s measured width, trim the 1×2 inch, pine board. Mark screw eyes at a distance of 4 inches from the board’s ends and create pilot holes.
Attach Lining Fabric of Roman Shades
Sew the lining panel to the shade panel along the side edges, and right sides together. Turn to the right side and press firmly to position the lining in the middle of the shade’s back.
Add Dowel Casings and Assemble Roman Shades
Place the 1-1/2-inch wide dowel casings using a quilter’s ruler, measuring tape, and a washable fabric marking pen. Precisely along these lines, stitch the dowel casings.
Finally, fold the raw edge of the shade over the top of the mounting board and check the fit to the window. Insert the dowels in the casings and stitch a small cabone ring on each dowel casing.
Mount a Cleat for Cords
Install a cleat on the right side of the window frame, halfway between the top and bottom, to hold the cords taut. Place the cleat closer to the top of the frame if you live with young children to reduce the possibility of entanglement. Drill a frame’s pilot holes. Install the cleat and add cords to the Roman shades.
Hang the Roman Shades
To secure the shade to the interior of the window, insert two wood screws through the bottom of the mounting board. Raise the shade to its highest point and fasten the cords to the cleat to set the pleats. Put the pleats in place by hand and leave them there for a week.

Leave a Reply